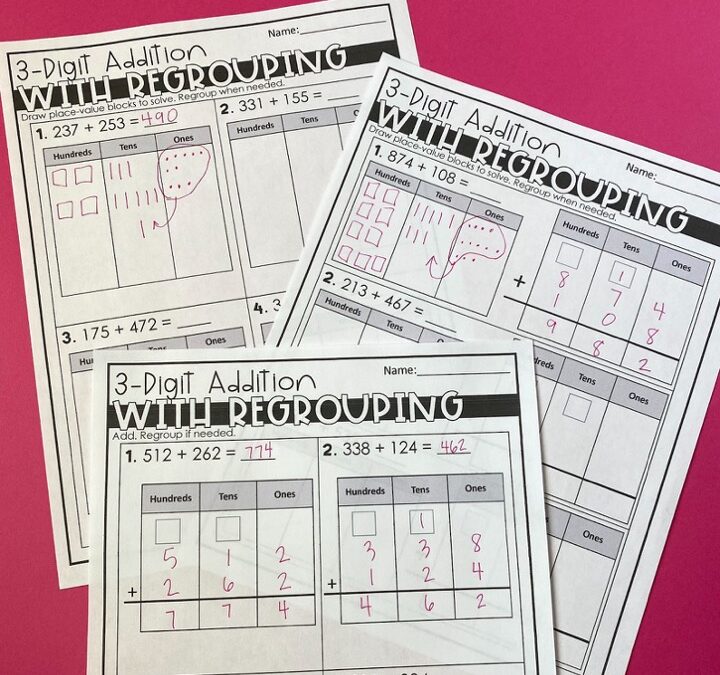
The regrouping method for 3-digit addition is one of my favorite things I teach my 2nd grade students. I love how students can use place value concepts and find patterns that help them add using the regrouping method. I find that my students learn this method best when they truly understand why they need to regroup instead of just memorizing the steps or following rote rules. But once they discover those patterns for themselves, they will never forget them. They will be able to add 3-digit numbers with ease! And to get my students to this point, I like to break down how I teach adding 2 3-Digit numbers with regrouping into 3 lessons.
The regrouping method helps students be fluent when adding 3-digit equations. There’s a way to teach it so students actually understand why they are doing what they are doing when it comes to regrouping.
But before we get started, it’s important to know that students do much better on these 3-digit addition strategies when they are fluent with their basic addition and subtraction math facts. I have a free workbook to help you get your students to math fact fluency: The 7 Steps to Ensure Math Fact Fluency. Download your free copy here.
Also… If you’re a parent who has a child struggling with math, you’ve got to check out Learner. Learner is an online tutoring platform that sets students up for success. To get started take a short quiz about your child’s needs. Then Learner’s Success Management Team reviews that and matches your child with the perfect tutor. Get your $25 trial here.
Regrouping Method
To help my students see when they need to regroup, I like to show them with place value blocks. I place out the first number with the needed number of hundreds blocks, ten rods, and then ones blocks. Down below I add the second number. I lay out those hundreds, tens, and one. I make sure I put the hundreds by the other hundreds, the tens by the other tens, and the ones by the other ones.
Once I have those laid out for students to see, I show them that we start with our ones. If there are ten or more, I show regrouping those into a ten rod. Then we count the tens. If there are 10 or more, I show the regrouping method of exchanging those into a hundreds block.
I like to show my students examples of equations where they need to regroup and where they do not need to regroup.
I also have display pages that I use to show this. These display pages show 3-digit addition with regrouping examples.
For students to be successful with the regrouping numbers, they need to understand that 10 ones make 10. They need to know that 10 tens make 100. Students also need to know that where the digit is placed in a number, shows its value. I like to have these important place value lessons before I begin teaching any 3-digit addition strategy. Learn how I teach these place value lessons here in this blog post: Place Value Standards: How to Best Teach Them to 2nd Grade Students
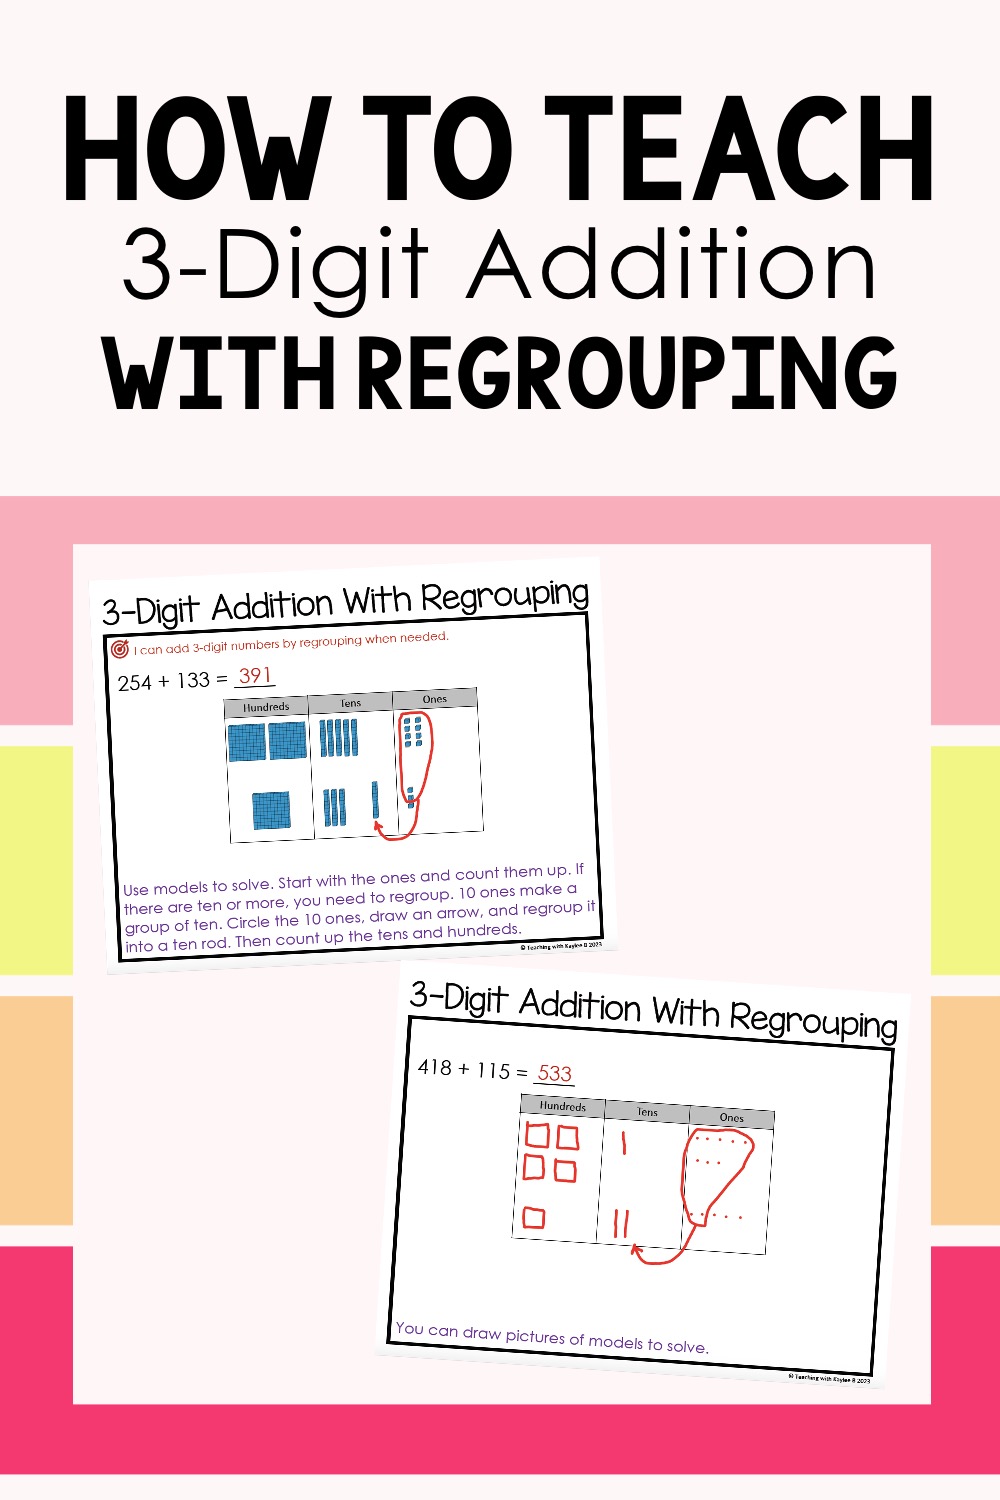
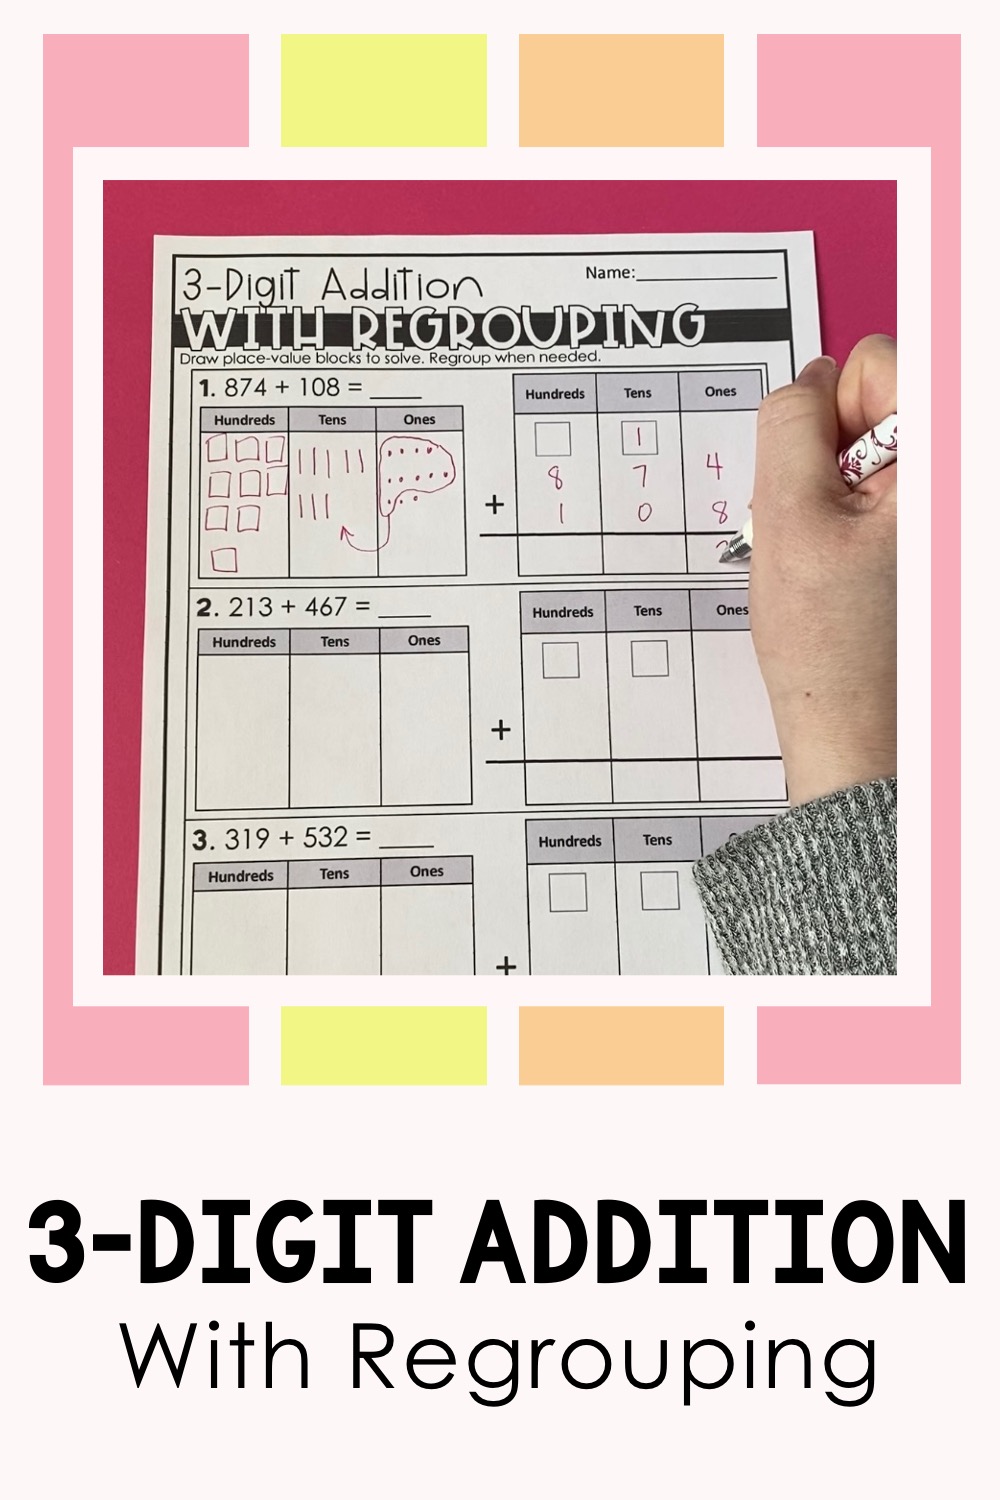
Having students draw the pictures to solve 3-digit addition equations helps them understand the grouping method.
These display pages show a hundreds, tens, and ones chart. That way I can model to my students that we can draw out the place-value blocks to solve. I show that we draw big squares under the “hundreds” section to represent the number of hundreds in the numbers. Then I show how we draw lines under the “tens” section to show the number of tens in each number. After that, I show we draw dots under the “ones” section to represent the number of ones in each number. I like to point out to students that we need to fill in these dots so we can see them well when they draw them with pencil on their 3-digit addition with regrouping worksheets.
After we get the pictures drawn, we count up the ones and see if we need to regroup. If we do, I show students that we circle ten of the ones. Then we draw an arrow over to the “tens” section and then regroup those into a tens rod. We then count up the tens and see if we need to regroup. If we do, I show students that we circle 10 of the tens. We draw an arrow over to the “hundreds” section and then regroup those into a hundreds block. Then we can count the numbers of ones, tens, and hundreds to get our answer.
We may practice a few more of these on the board with these display pages. Again, I like to show examples where we need to regroup and some where we do not need to regroup. Then I ask students how they know if they need to regroup. They have started to see the pattern that when there are ten or more, we need to regroup. Find these display pages I use to teach the regrouping method here.
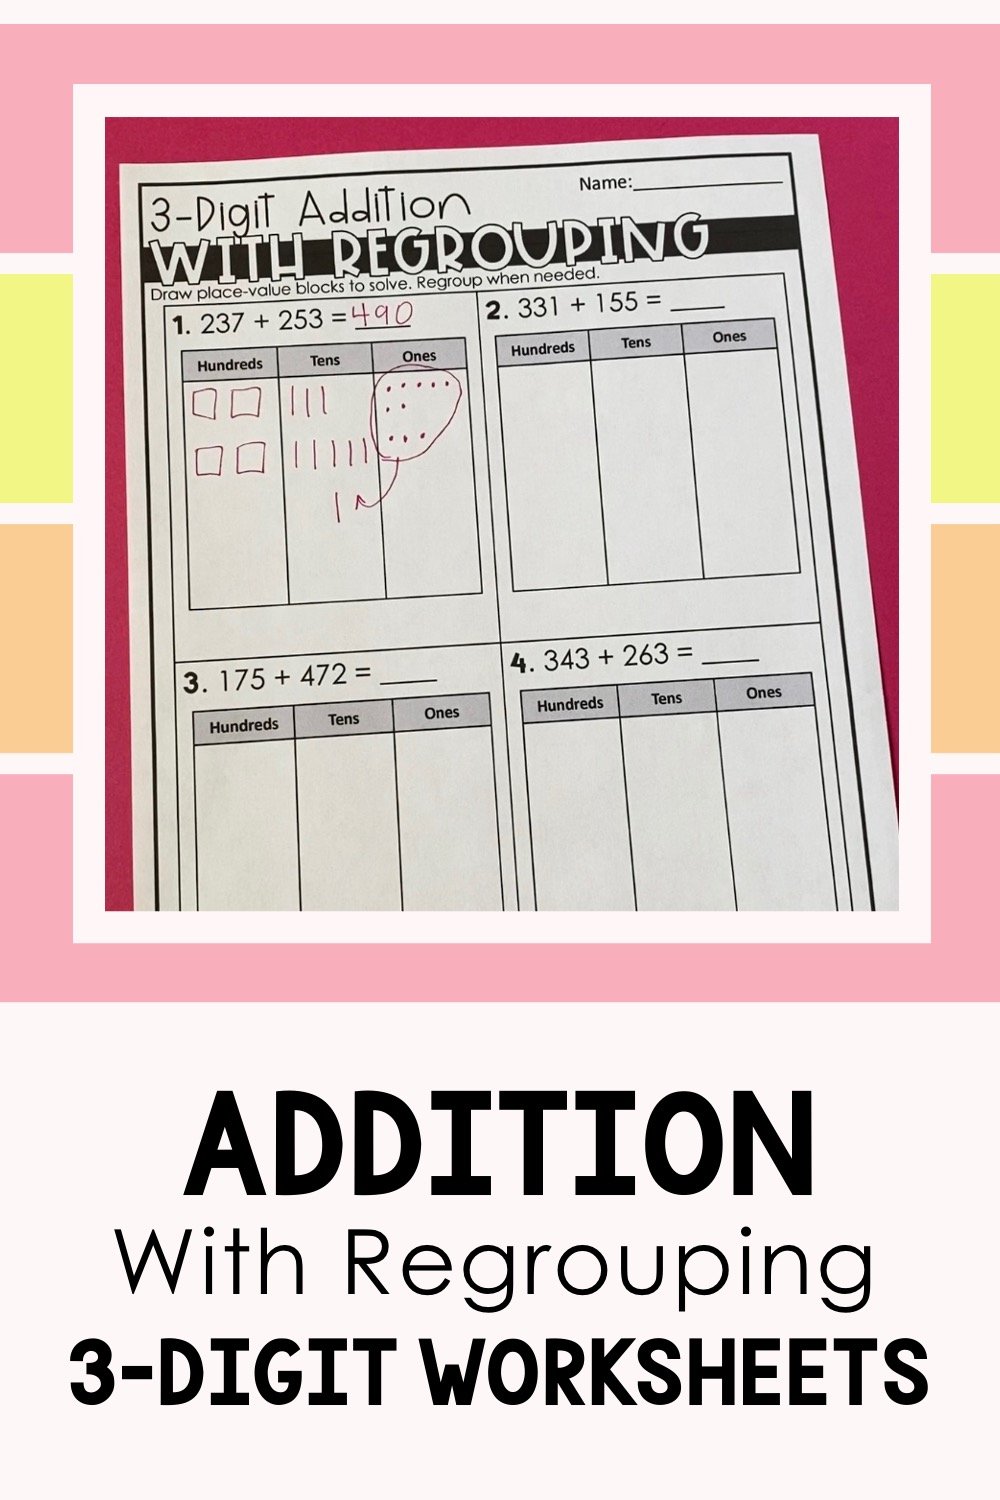
These addition with regrouping 3-digit worksheets help students by giving them a hundreds, tens, and ones chart to guide them as they are drawing the models to solve.
Then I get students their own practice by giving them addition with regrouping 3-digit worksheets. Since these are a 3-digit addition with regrouping worksheets pdf, I display the pages up on our whiteboard as well. We do the first couple problems together, but then students complete the rest by themselves. Find these worksheets I have my students do here.
When students are completed with their worksheets, they know to come meet me at our classroom table. They make a line by where I am sitting. I take a quick look over their work and give any needed help. Students fix any mistakes and then I give them a big check mark on their page with one of my special smelly markers.
This is a great system because I also tell students who need help to take a seat at this table. I go back and forth from checking work to helping students. It works really well! It also helps me give immediate feedback to my students. Plus, it helps me save time because I am not checking work after school.
Once I have checked students’ work, I pair them up with a partner and they do a little regrouping sorting activity. I have cards with 3-digit addition equations. Some need regrouping to solve and some do not. Students work with their partner to sort the equations on whether or not they need to regroup. When students are done, they raise their hands and I do a quick look over their work.
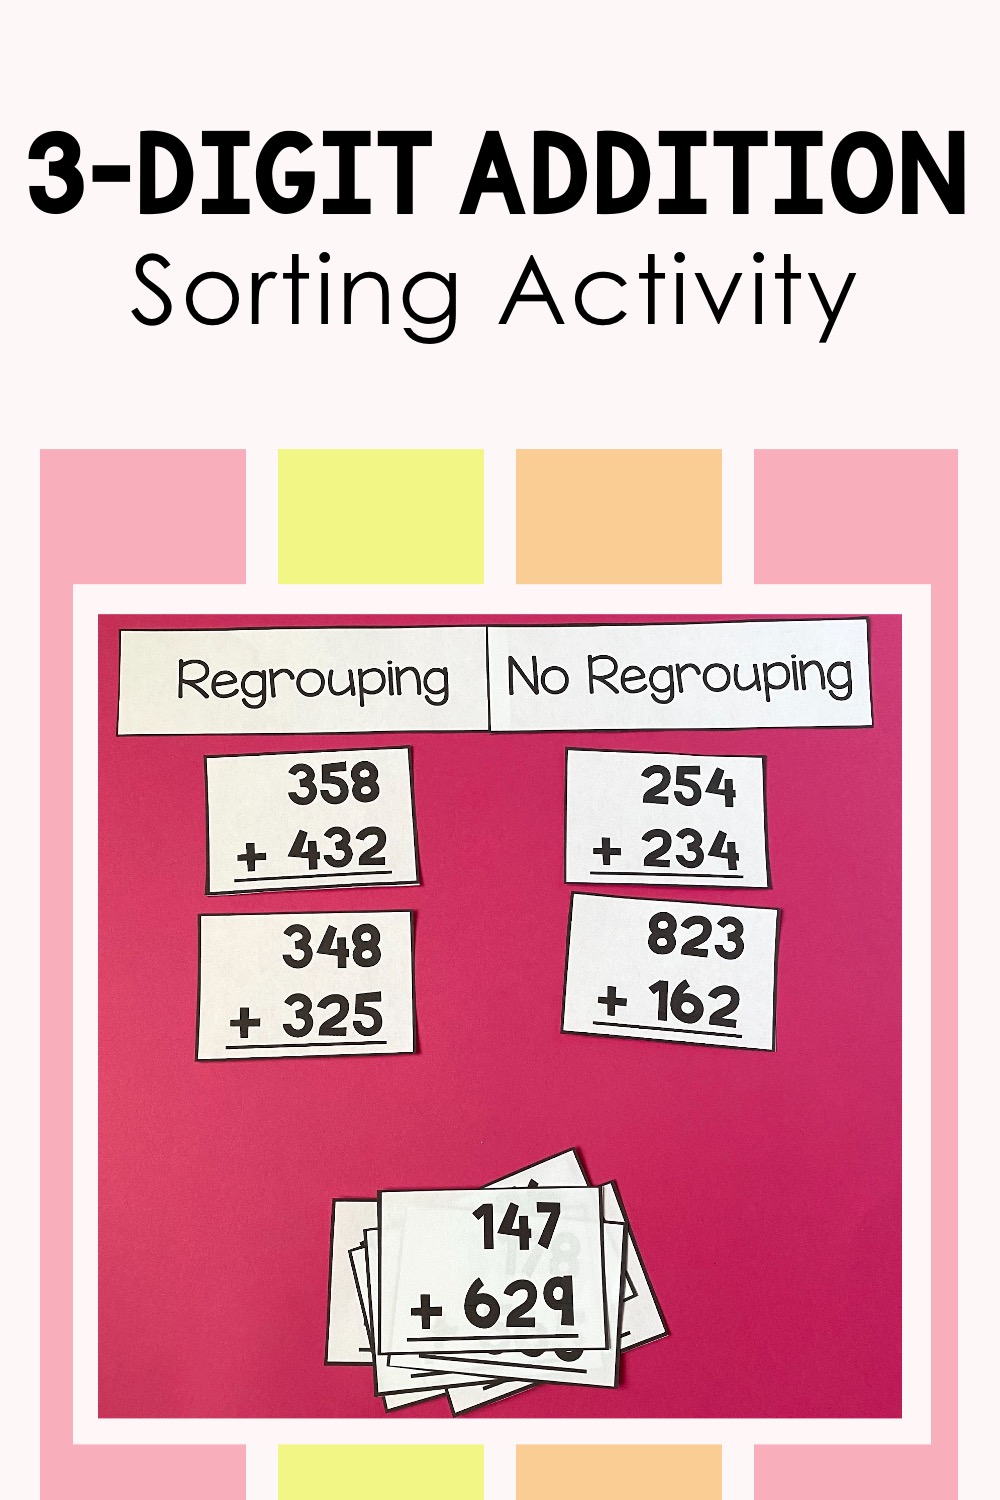
This sorting activity helps students see the pattern of whether they need to regroup when adding 3-digit equations or not.
Find this sorting activity here.
Then those students can go do one of our fast finisher activities for the remainder of our math block. Check out my list of engaging fast finisher activities here in this blog post: 12 Fast Finisher Activities That Are So Fun
Regrouping Method Addition
For lesson 2, I like to still have my students draw the pictures of the place-value blocks but then they also record the numbers and what they are doing with grouping in a separate hundreds, tens, and ones chart. This chart is special because it has “regrouping” boxes above the tens and hundreds places. This is where students write the numbers if they need to regroup.
This regrouping method lesson helps scaffold students from drawing the pictures to solve 3-digit addition equations to just lining up the numbers to solve.
Like the lesson before, I model how to do this to my students. I use display pages where I draw the pictures and have the hundreds, tens, and ones chart where I fill in the numbers.
I fill in the numbers and draw the pictures. We count the ones and record the number. If we need to regroup, we circle those ones and regroup it into a ten. I record that in our regrouping box above the tens and we write the leftover ones in the ones section.
Then we count up the tens and regroup if needed. If we do, we circle 10 tens, and regroup it into a hundreds block. I record that in our regrouping box and count the leftover tens.
FInally, we can count up the number of hundreds and record that number in our chart to get our final answer.
I’ll show students a few more examples of this and will get them involved in practicing the regrouping method by asking questions. These questions might be like “what do we do now” or “what do we do next?” Find the display pages I use here.
Then students are ready to get their own practice. I have them do addition with regrouping 3-digit worksheets. These have the same set up as the display pages. I still like to do a couple of the problems on the worksheets with my students but then they do the rest by themselves. Find these worksheets to have your students do here.
Then just like the lesson before, students line up by our classroom table when they are done and I give any needed help as I check their work.
Once I have checked their work, I have students do a scoot activity around the room with a partner. I have taped up task cards around our classroom that have different 3-digit addition equations. Students go around with a recording sheet and solve to find the answers.
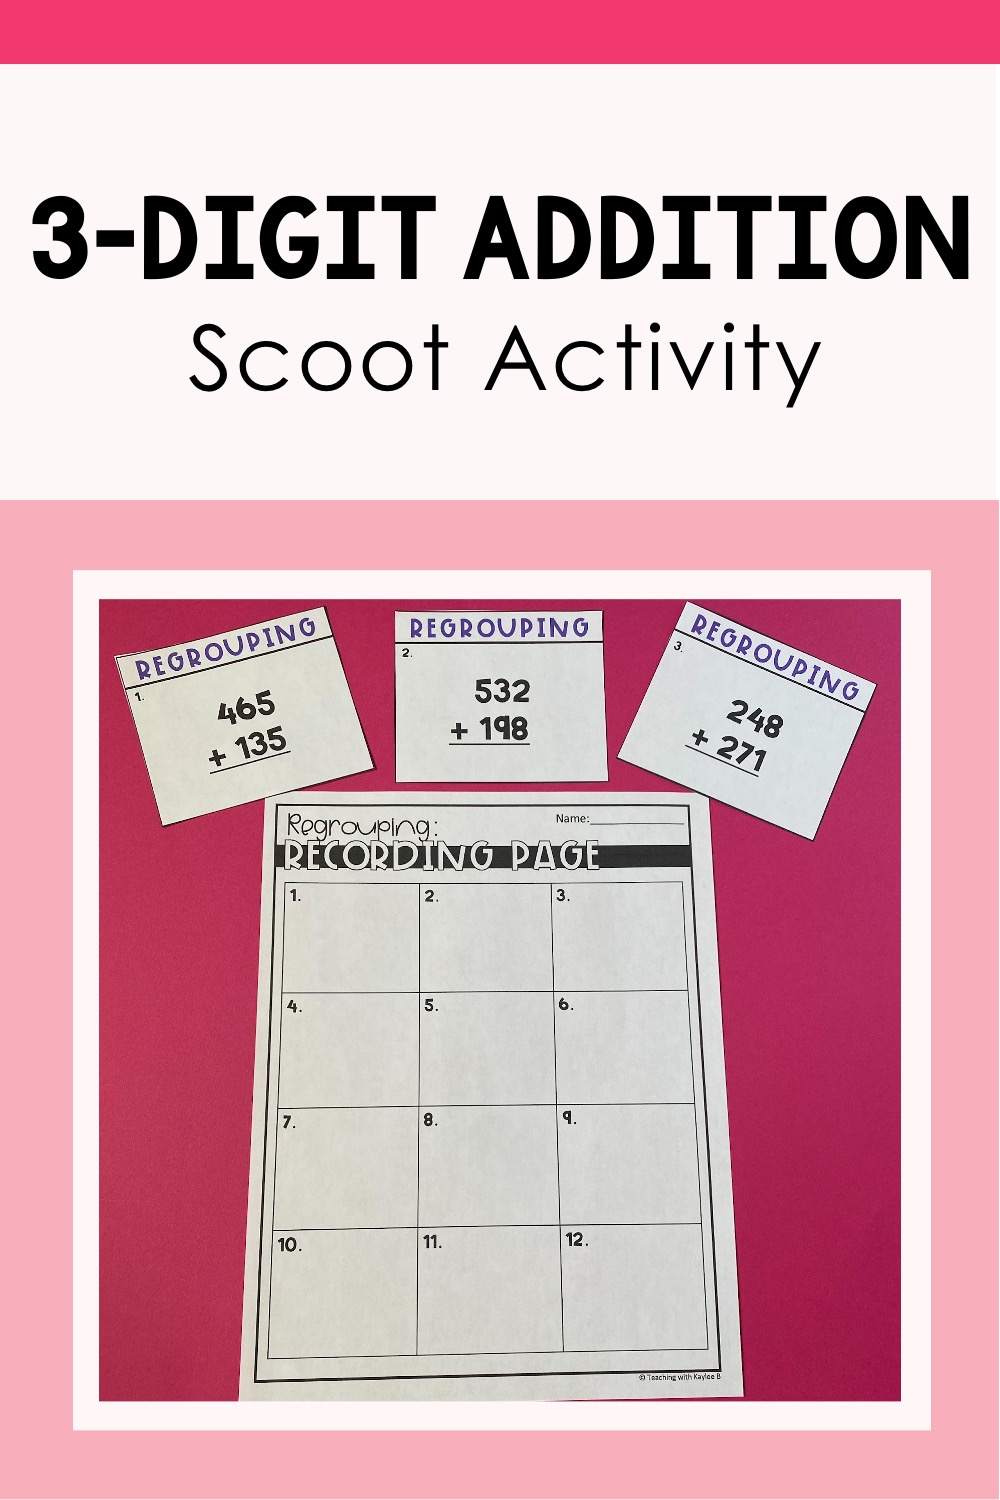
I love this scoot activity because it gives students extra practice with the regrouping method for addition 3-digit numbers.
Find this scoot activity to do in your classroom here.
I set out an answer key so students can check their own work once they have finished. Then they go do a fast finisher activity after that. Many of the fast finisher options for my students are math games that help them practice their fact fluency. Learn about these games here.
Addition With Regrouping 3-Digit Numbers
For lesson 3, I want to transition students from drawing pictures to solve the equations to just using the patterns they have learned to solve.
I write up 3 equations where students have to regroup. I tell them to pay attention to what I put in the regrouping boxes when I need to regroup. After I solve it, I ask, “what did you notice about the numbers?” I want them to notice that a “1” goes in the regrouping box because it shows the ten when we add the ones numbers together. For example, if the ones numbers were 8 and 4, 8+4=12. 12 has a group of ten and 2 left over. That is why there is a “1” in the regrouping box, and a 2 in the ones place. We just wrote the number 12.
I show my students a few more 3-digit addition with regrouping examples with our display pages and get them involved in solving these by asking questions.
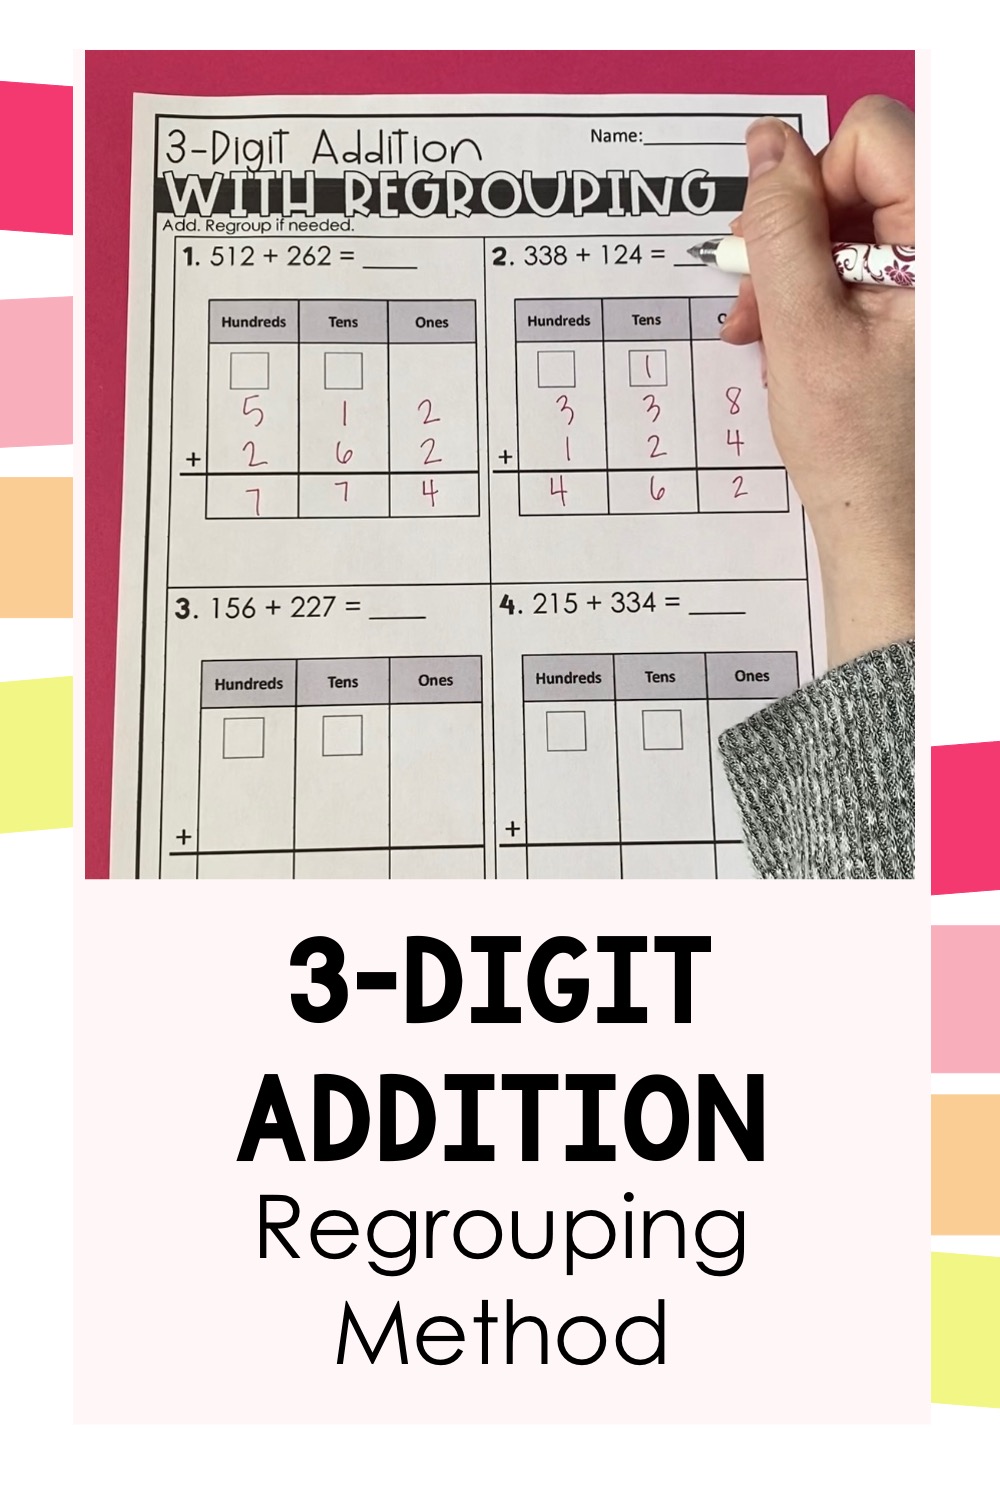
When students notice patterns and apply them it makes the regrouping method so much easier for them.
Then they are ready to practice with worksheets. I do the first couple of problems with my students and then they do the rest by themselves. Find these worksheets here.
We follow the same system as the days before for me checking their work.
Then I have a really fun activity for my students to get some extra practice with this. It’s a regrouping method scavenger hunt!
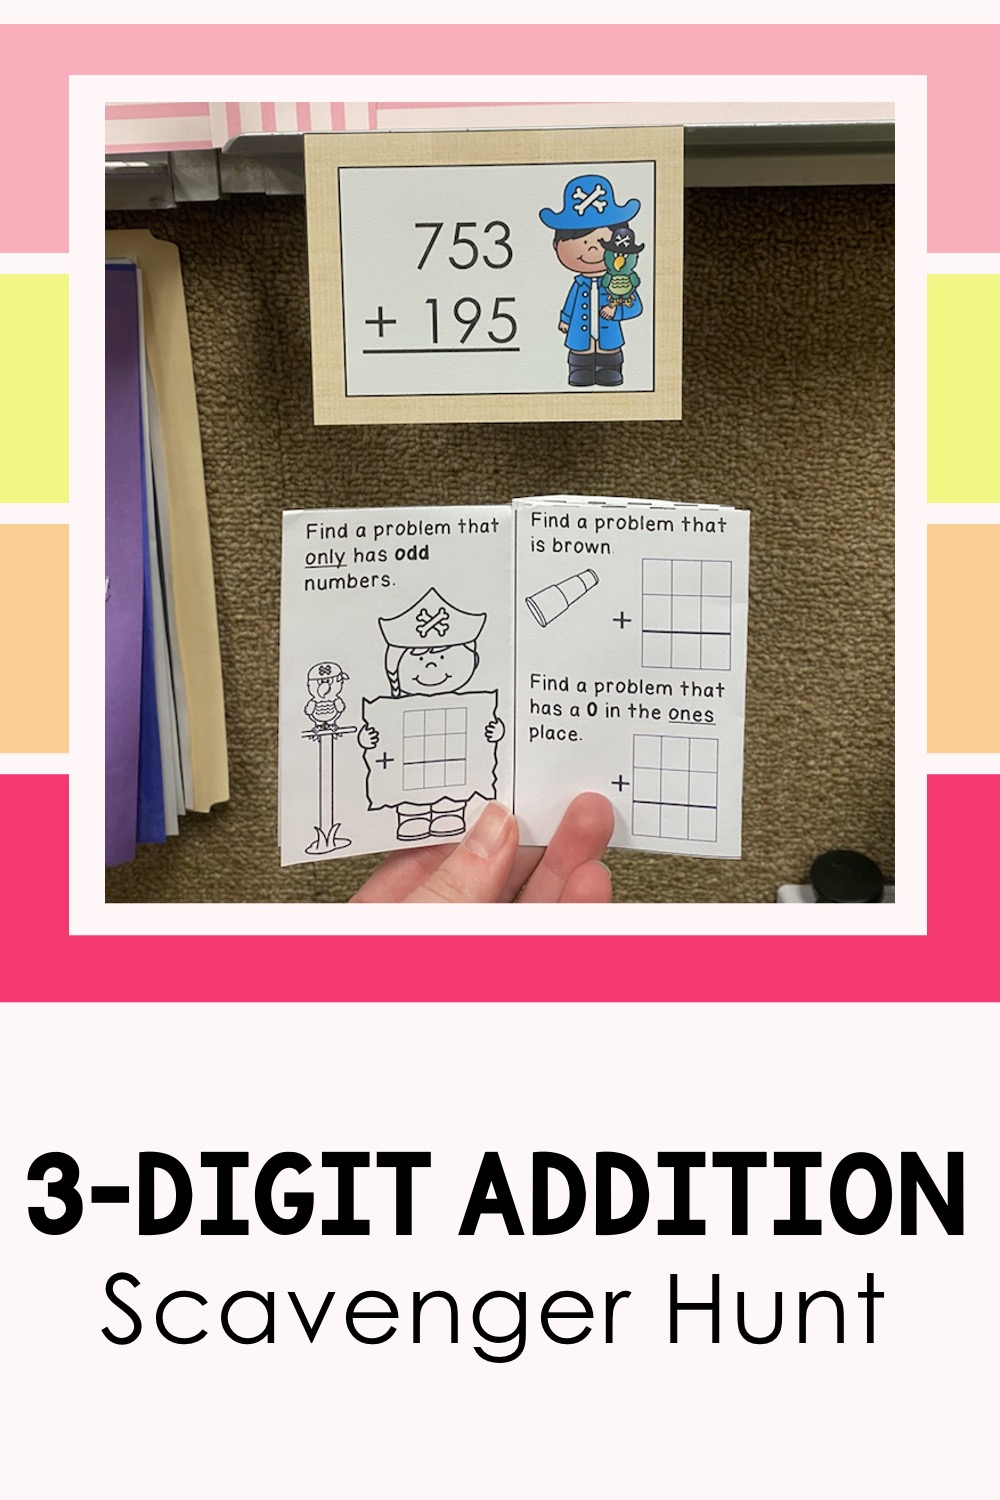
When students are doing this scavenger hunt, they don’t even know they are practicing the regrouping method because they are having so much fun!
I make these cute little books for students and it has prompts like, “find an equation with only odd numbers.” Around the classroom I have taped up different equations, so students go around and find that equation with only odd numbers and solve it. Students think this is so fun! Find this scavenger hunt to have your students do here.
Then I’ll have students complete an exit ticket. This is a slip of paper that has students solve just a couple problems using the regrouping method. I check these later and I can see who has mastered the regrouping method and who needs a little more practice.
Then I can use the extra versions of the worksheets students have been doing the past lessons to help students in small groups.
I also have fun color by number worksheets where students practice regrouping. These are great to set out as an independent center activity.
Find all of my addition with regrouping 3-digit worksheets and other resources I’ve shared today in this TpT product here. It has the display pages for direct instruction, all of the scaffolded worksheets for guided and independent practice, it as the sorting activity, the scoot activity, the scavenger hunt, and the color by number worksheets for extra practice, and then the exit tickets for assessment. Find this resource in a money-saving bundle with all of my 3-digit addition strategy resources here.
I hope you have been able to see that it doesn’t have to be complicated to teach your 2nd grade students 3-digit addition with regrouping. It comes down to breaking it up into 3 lessons. The first has students solving by drawing the pictures of the place-value blocks. The second lesson has students draw the pictures to solve but also has them fill in the numbers of what they are doing in a hundreds, tens, and ones chart. This helps them see patterns that they can use for the third lesson where they just line up the numbers to solve.
This way of teaching the regrouping method helps students truly understand why and when they need to regroup. Soon students are fluent with adding 3-digit numbers with regrouping!
The regrouping method isn’t the only 3-digit addition strategy I teach my students. Learn about the others in these blog posts:
Open Number Line Strategy: How to Best Teach it Using 3-Digit Numbers
Partial Sums Addition Method: How to Best Teach This Method to Second Grade Students
Learn how I teach 2-digit addition with regrouping here in this blog post: How to Best Teach Addition with Regrouping
As an Amazon Associate I earn from qualifying purchases.
